Adding and Organizing Content in MonoGame
One of the most important tasks was to get my art and sound assets into the game. MonoGame's Content Pipeline tool provides an easy way to accomplish this task.
When thinking about how I was going to organize the code for loading my content assets, I looked at several different tutorials and projects from other developers to get some insight into how they were handling their setups. I like taking this step for a couple of reasons:
- I like to compare different approaches that different developers take. Some approaches might be more suitable than others, and each has its own pros and cons.
- I feel it helps me to get more familiar with the tool I'm using. No one tutorial is going to cover everything, so looking at multiple tutorials helps me to cover a lot of ground, with actual applications and examples.
Even as someone who has experience with programming and software development, I feel that it is important to remain open to learning from other developers' approaches, so that's why I try to share tutorials and other resources that I find, hoping that they're helpful to you as well.
One tutorial that I really found helpful was for a brick-breaking game (think about games like Arkanoid and Breakout), which you can follow here: http://techsnackbar.com/monogame-tutorial-building-2d-game-using-csharp/.
Separation of Content Loading Class
In this particular tutorial, the developer used an approach to loading content that I think was pretty handy. He created a class called GameContent that loads all the game assets, and then he could instantiate that class and pass a reference to that object to any other game objects that might need it. I see in a lot of other projects, developers will load the content all directly in the Game1 class, and then will pass a Game object reference to other objects that will need to use assets. For example, a lot of objects will need to use textures/sprites, so the developer would either load the texture in the Game1 class and save it as a member variable, or instead use the Game1 reference within another object to access Game1's content manager, and load it the asset in that other object.
Either way, you're going to be accessing and using the reference to Game1's content manager, so I guess it's really a matter of preference where and how you reference it. An advantage I can see to using a separate GameContent class is that if you're making a larger game with lots of assets, like maybe on the scale of an 40-hour RPG, a separate class might help to keep the Game1 class from becoming overly cluttered. It's also a good way to make sure that we're dividing up functionality into appropriate classes and methods, in following with the "separation of concerns" principle, which you can read more about at https://effectivesoftwaredesign.com/2012/02/05/separation-of-concerns/.
Using the Content Pipeline Tool
Ok, so the first step I took is to create and load assets into the game using the MonoGame Content Pipeline Tool. If you're not familiar with the Pipeline Tool or content management in general in MonoGame, I'd suggest you check out RB Whitaker's tutorial at http://rbwhitaker.wikidot.com/monogame-managing-content. Actually there's a lot of great MonoGame and C# tutorials there, so I highly recommend taking the time to go through them. You can also check out the official documentation at http://www.monogame.net/documentation/?page=Using_The_Pipeline_Tool.
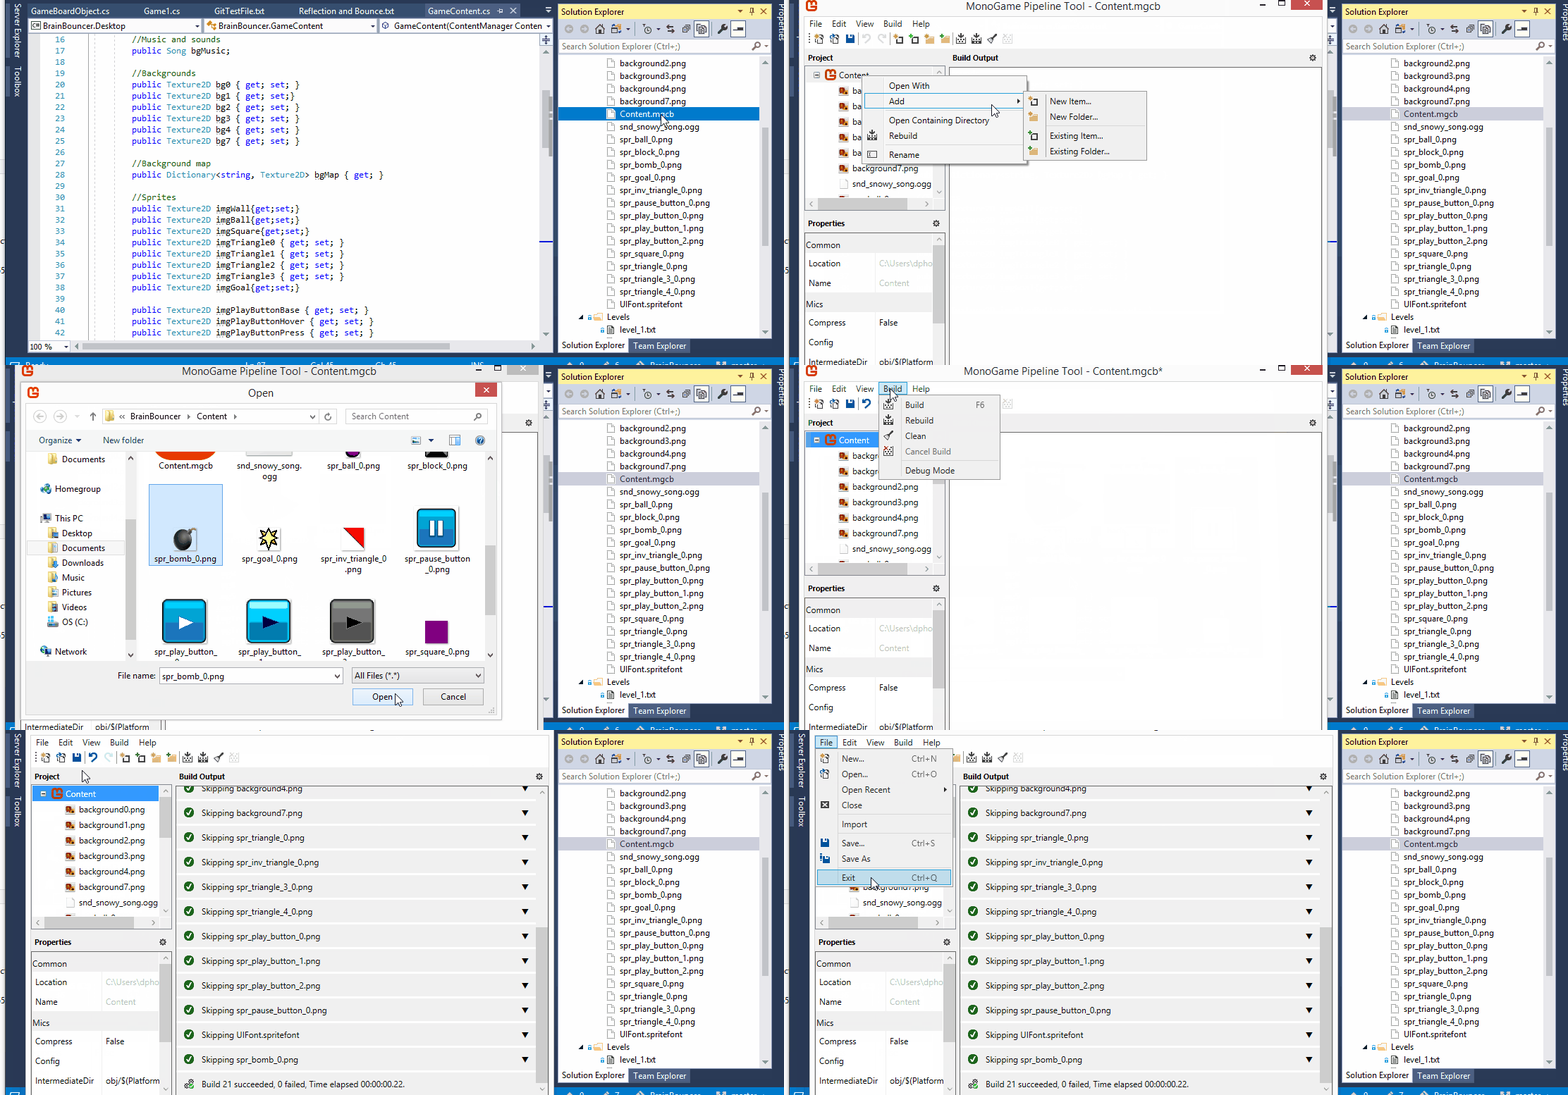
Here's a look at how I loaded new sprites and other assets into the Content pipeline. I am adding a bomb sprite in this example, which you can see in the screenshot GIF below:

In the Solution Explorer, under the Content folder, double click on the Content.mgcb item to open the Content Pipeline tool. Under the Project window, right-click on Content, and then choose Add and then Existing Item (I chose Existing Item because it's a sprite that was already created). You'll see that a file dialog opens so that you can select a file to add. Choose your file, then on the menu at the top of the screen, go to the Build menu, and then choose Build (or, you can just press F6). I already had other content items that I didn't want to rebuild, I chose Build instead of Rebuild or the other options. Once you see a "Build Succeeded" message at the bottom of the Build Output window, you should make sure to Save, and then exit the Pipeline tool.
You should see back under your Content folder that the filename of the sprite or other asset you added is included. You might notice in the screenshot GIF that I posted that I already had spr_bomb_0.png in the folder before I even clicked on the Pipeline tool. I had added and deleted the file while preparing for this write-up, but had never actually updated the Solution Explorer to remove the file.
So that's how I added my assets from the Game Maker Studio project to the MonoGame pipeline. Instead of choosing just one file at a time like I did with the bomb sprite, you can also hold down the Shift key (on Windows) while selecting multiple files in the file dialog, so that you can add many files at once.
Creating and Using the GameContent Class
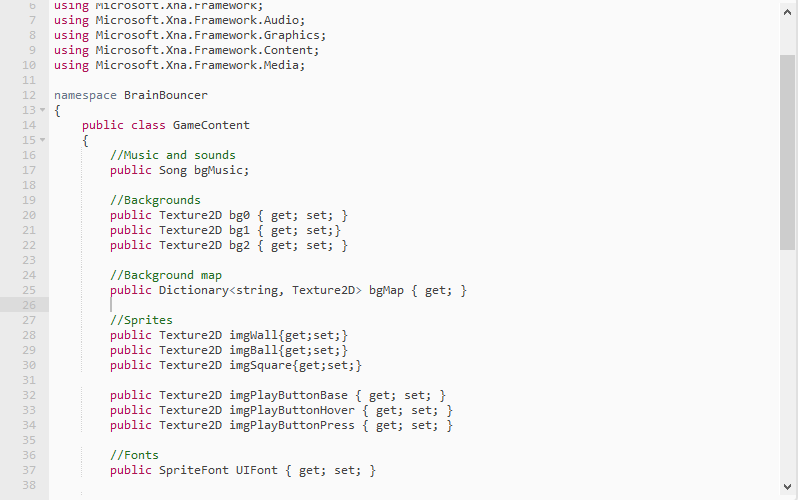
Now that we know how to add assets to the pipeline, let's look at how I set up my GameContent class. As I mentioned, I based it on the brick-breaking game tutorial I mentioned earlier. The class is pretty simple; I've included the variable declarations for my assets at the top of the class, as you can see below:

You can see that in order to declare your asset variables, you need to make sure you're using the correct class for the asset type you want to load. Here's an overview of the object types:
- Sprites and backgrounds: Texture2D
- Music: Song
- Sound effects: SoundEffect
- Fonts: SpriteFont
For information on how to create a font for your project, check out this tutorial: http://geekswithblogs.net/cwilliams/archive/2017/02/22/243041.aspx.
If you'd like to see the basic code for my GameContent class, you can check it out here: https://codepad.co/snippet/gamecontent-class-sample. Note: Looking at that class, I really should change it so that there's no setters for the assets. See how in some lines I have { get; set; } ? I really need to take out the "set" part, because that allows the variable to be set to a different value. I shouldn't be allowing other parts of the code to change what files are associated with each asset, so I'm adding that change to my "To Do" list.
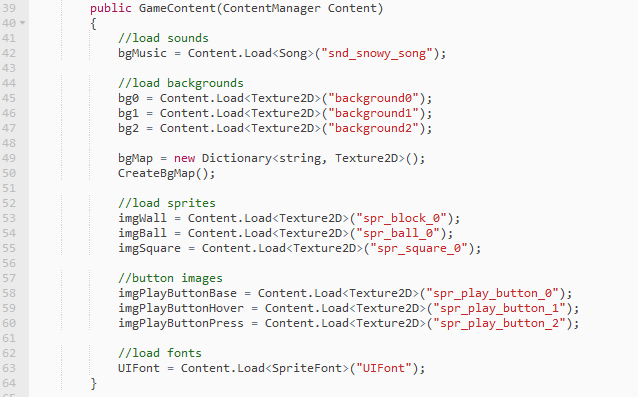
Then in the class constructor, I load my assets. The constructor takes an argument of a ContentManager object, which is what I use to load the assets, as you can see in the screenshot below.

Looking at the constructor code, you can see that to actually load the content, you use the ContentManager object that we passed in to the constructor. You would use the ContentManager's Load() method, with the asset class in angular brackets, and the asset filename in parentheses as the method's argument. So to set my wall sprite, for example, since the variable I created to store it was called imgWall, the line of code for it is: imgWall = Content.Load<Texture2D>("spr_block_0"); .
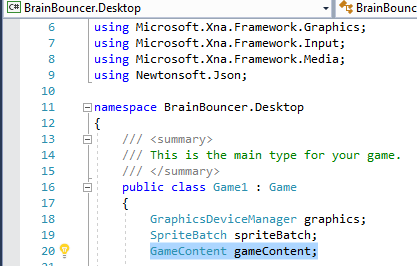
From that point, I
can create a GameContent object in my Game1 class, like so:

And then in the Game1 class's LoadContent method, I instantiate the GameContent object, as you can see below. Because the assets are all loaded in the GameContent constructor, I don't have to do anything else to get load assets into the game.

So that's it for now about how to load content using the Content Pipeline Tool, and deciding where to load my assets. Next time I'll be talking more about how to export level data from my Game Maker file, and then load it into MonoGame. It's a bit of a process, so I'll stop here for now.
Note: Since writing this entry, I have actually updated parts of the code I’ve mentioned here. For instance, I’ve made my GameContent class static, but the basics of how to load content should still be the same.
Get Brain Bouncer
Brain Bouncer
A bouncy puzzle game that will have you considering all angles.
| Status | In development |
| Author | cloudyheavengames |
| Genre | Puzzle |
| Tags | 2D, Physics |
| Languages | English |
More posts
- Saving the Level Data and Reloading from a FileNov 16, 2020
- Using Maps/Dictionaries to Score Game Level ScoresNov 07, 2020
- Converting and Loading Levels from GameMaker Studio with JSONOct 23, 2020
- Adding Source Control in Visual StudioApr 03, 2020
- Getting Started with the MonoGame Project: Setting Up a Shared ProjectMar 29, 2020
- Migrating from GameMaker Studio to MonoGameSep 17, 2019
- New features, and available on Google Play!Nov 23, 2017
Leave a comment
Log in with itch.io to leave a comment.